Windows 7
- Launch “Devices & printers”.
- Click [Add printer]。

- It popup “Add printer wizard”, click “Add a network, wireless or Bluetooth printer”:

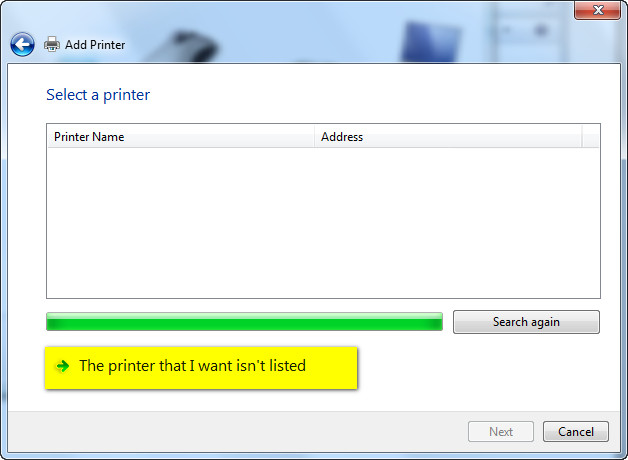
- Click “The printer that I want isn;t listed”:
- Input the printer path under “Select a shared printer by name”:
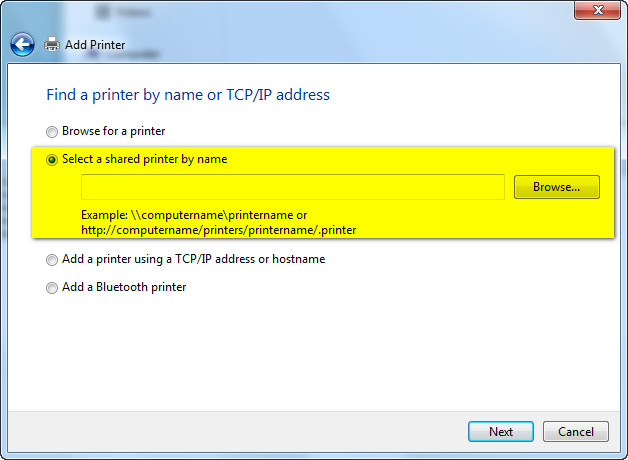
Our Cloud Printers:
Printer Path
Description
Purpose
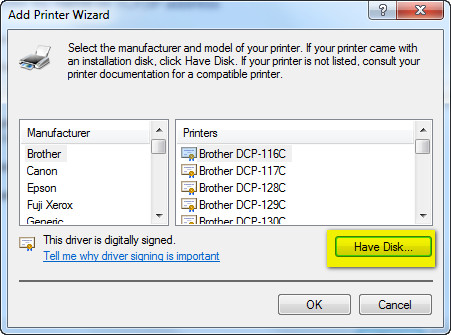
http://cups.directoutput.com.hk:631/printers/gray Convert all color to grayscale CTP http://cups.directoutput.com.hk:631/printers/ctp40 cmyk+spot -10% CTP http://cups.directoutput.com.hk:631/printers/ctp43 cmyk+spot -7% CTP http://cups.directoutput.com.hk:631/printers/ctp50 cmyk+spot Uncalibrated CTP http://cups.directoutput.com.hk:631/printers/film Film processing Film - Click “Have Disk”:
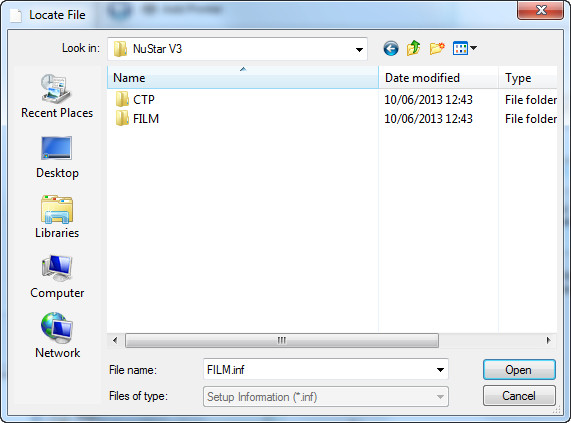
- Locate the printer driver that we provided for you:
- There might be warnings as below, click “Install this driver software anyway”:
- Complete the wizard and click Next:
Windows 8/10
- Windows 8/10 locks your computer for un-registered printer drivers, you need to temporary stop it by following the instructions in this web page, call us if you have problem doing it.
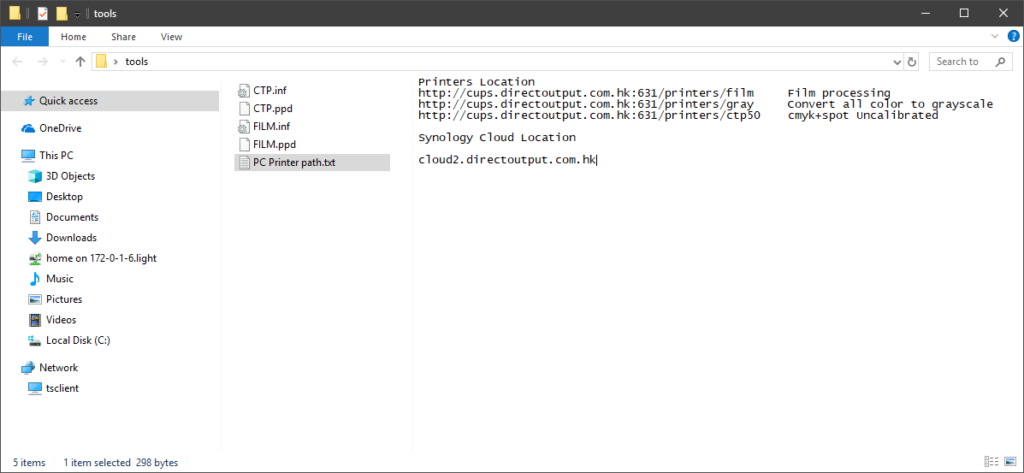
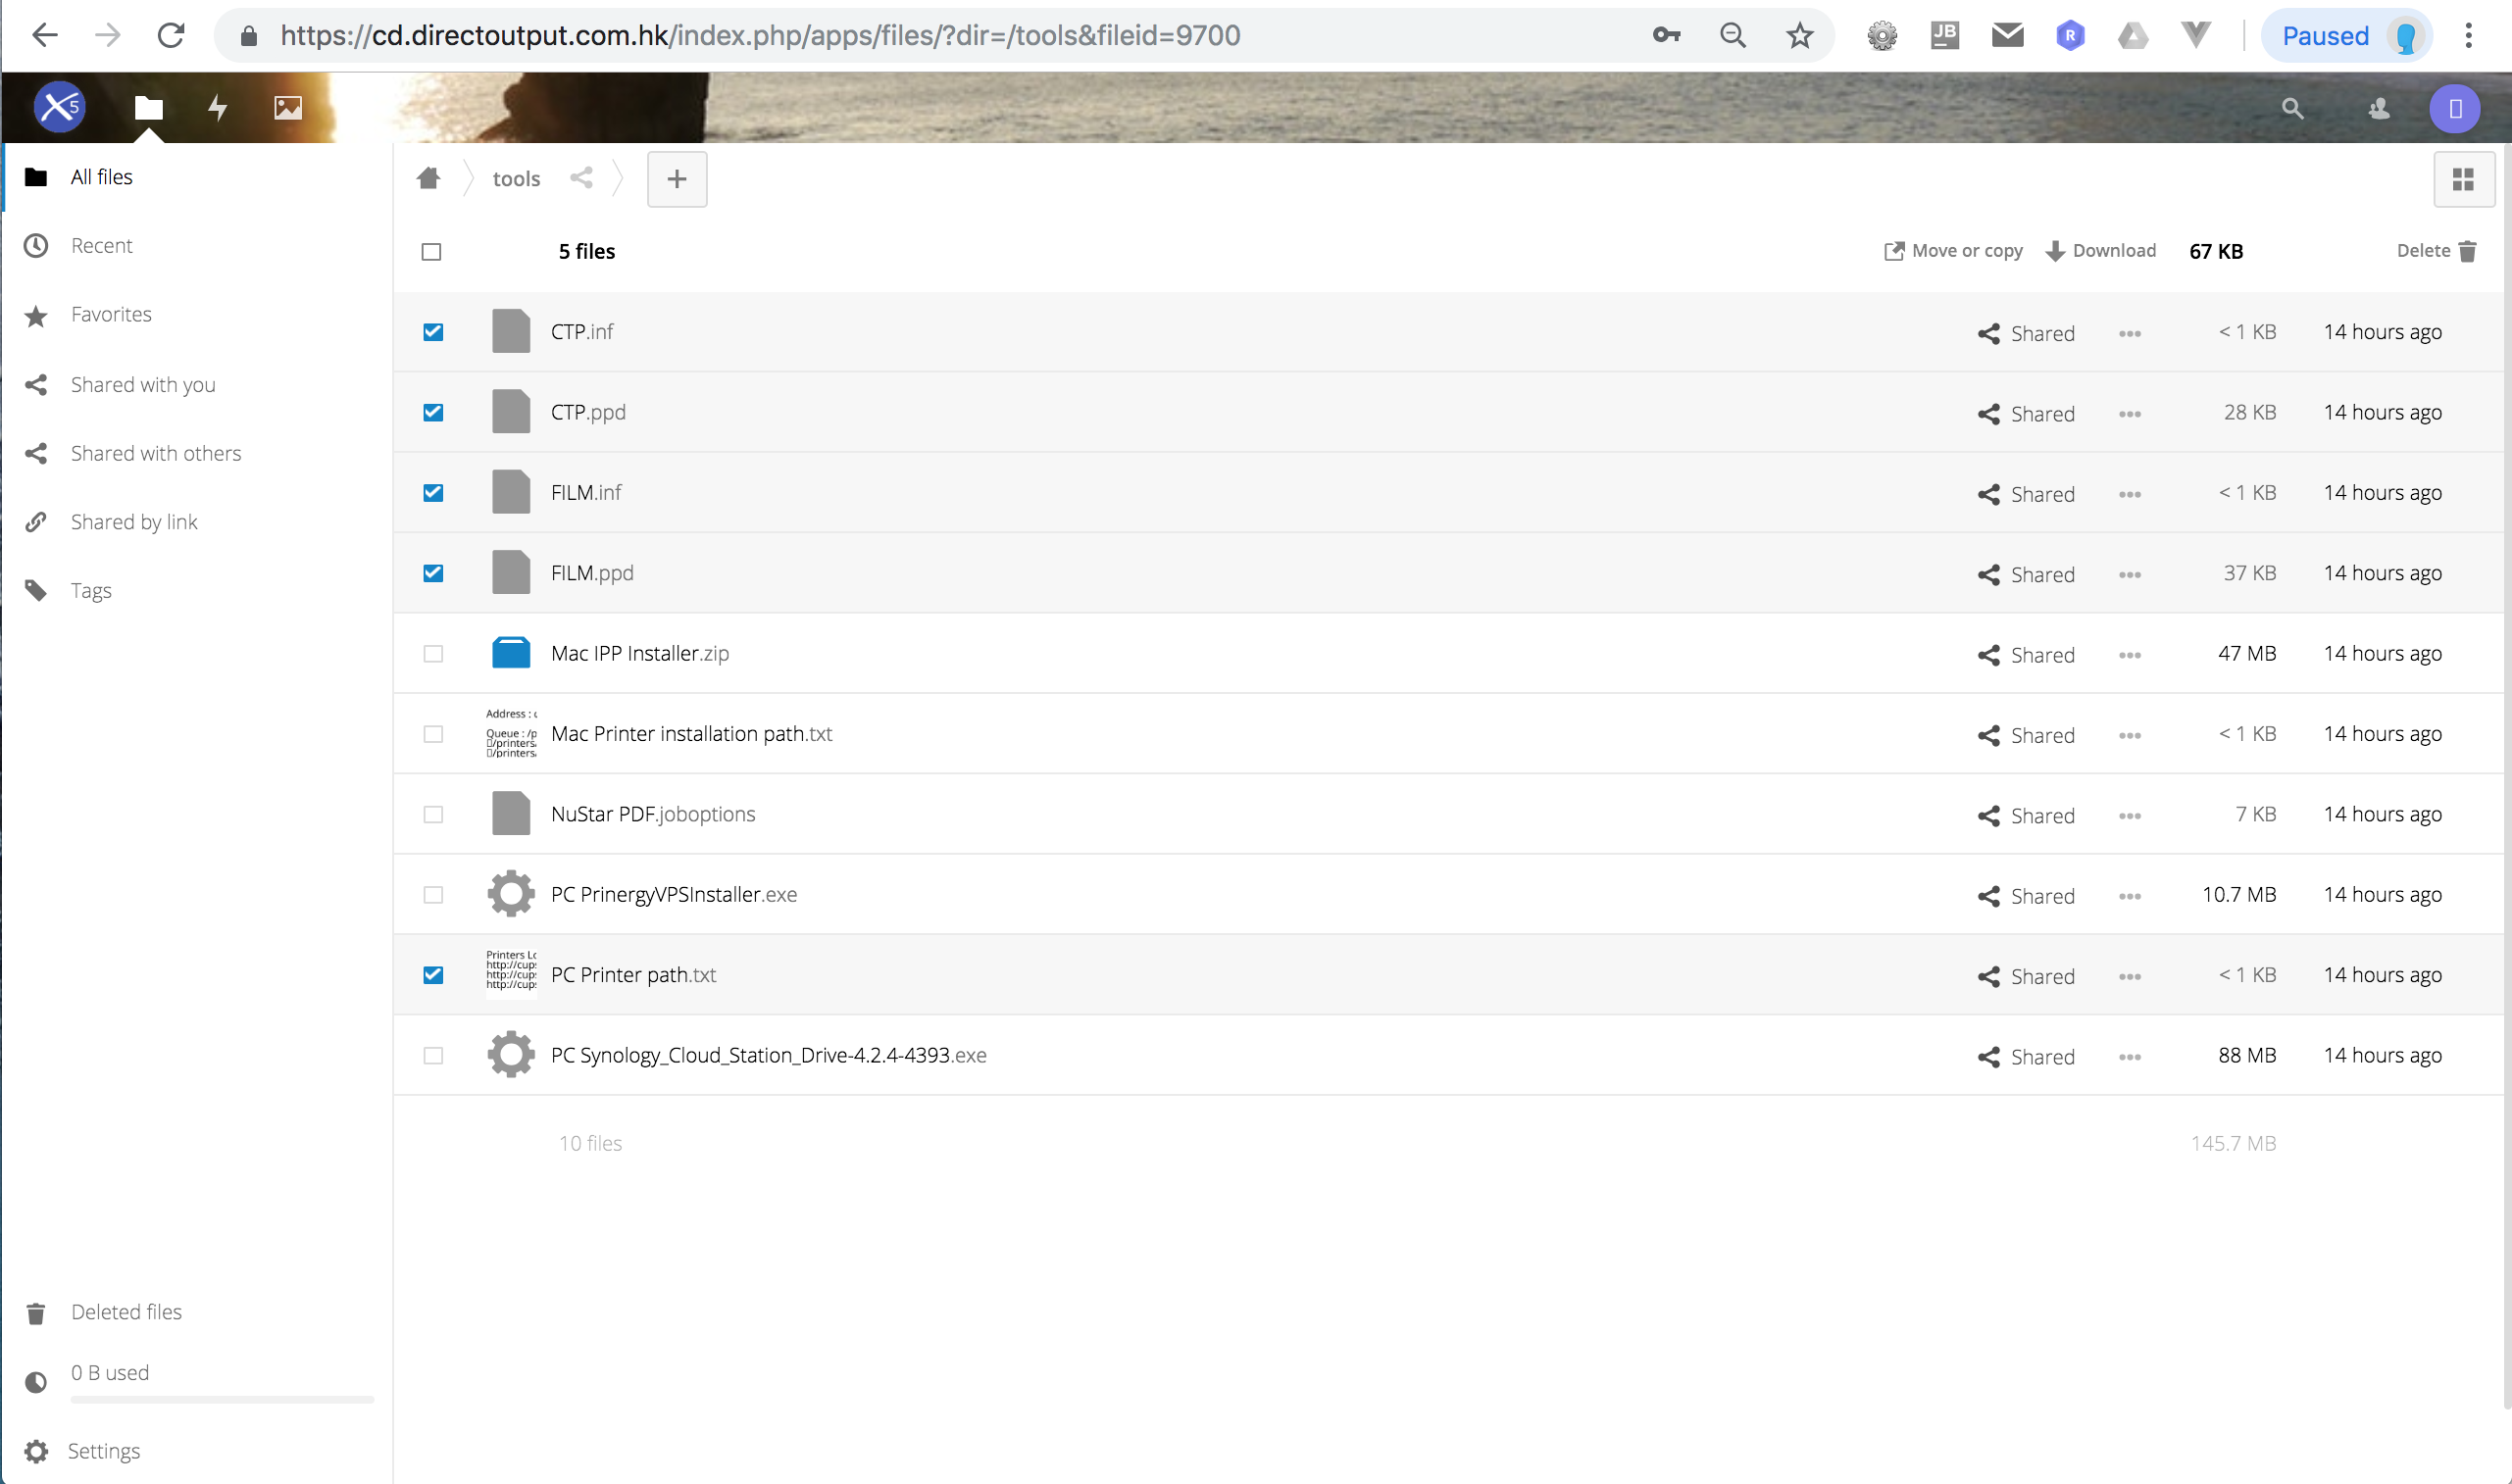
- Next is to download our printer drivers from you Cloud Disk, check these files under /tools and download it to your computer:
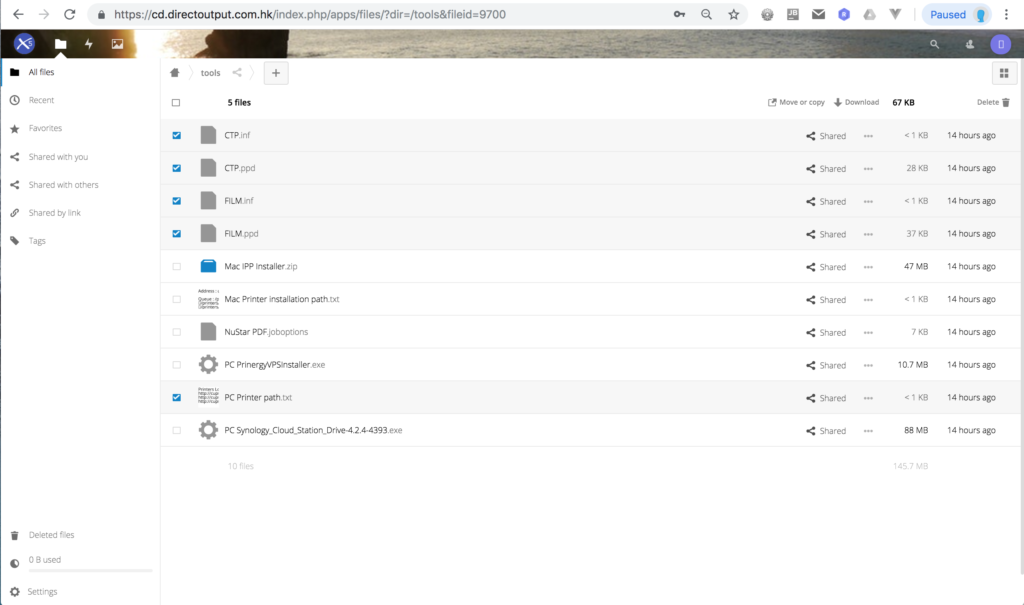
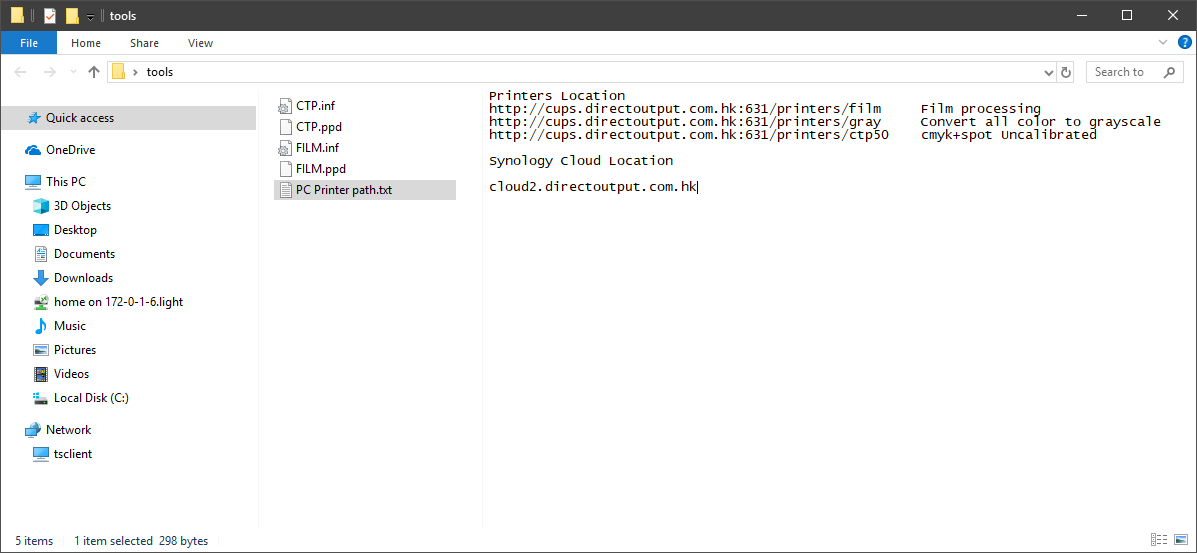
- Memorise the contents of “PC Printer path.txt”, you will need them during the process:
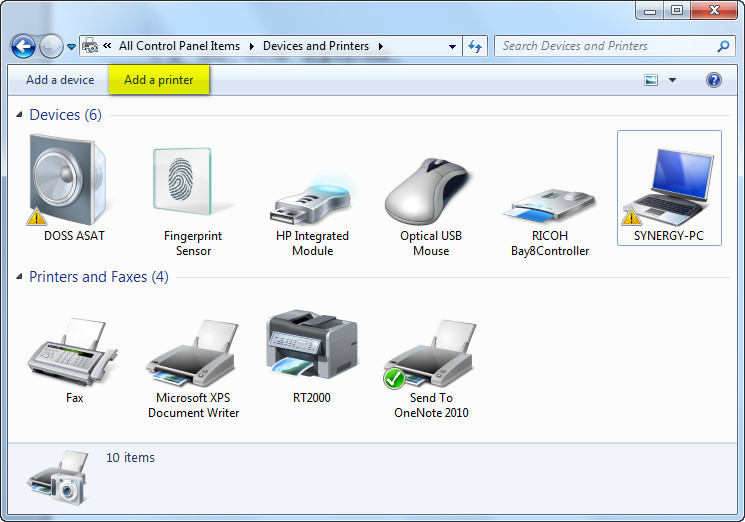
- Launch “Devices & Printers” and click “Add a printer” (the red circle on the upper left):

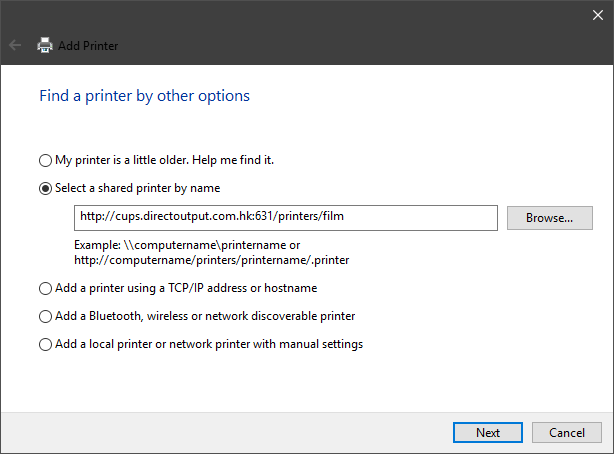
- Click “The printer that I want isn’t listed”, the red circle on the lower left:

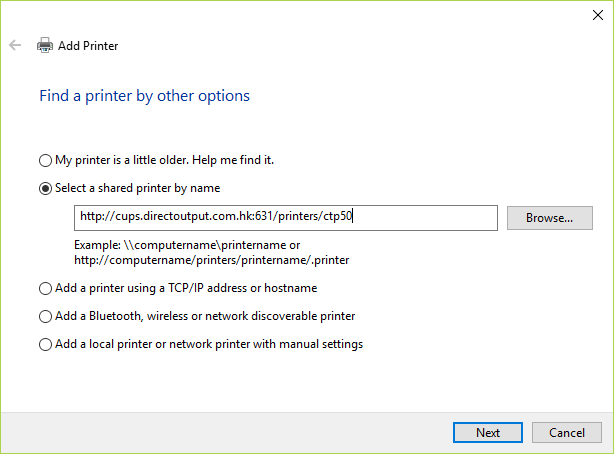
- Click “Select a shared printer by name” and input the printer path in the box. The first one is a Cloud Printer for output films, click Next:
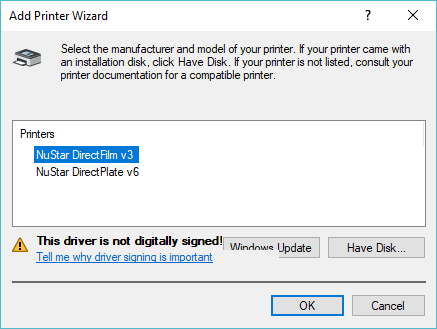
- You will be prompted by “Add Printer Wizard”, click “Have Disk”:
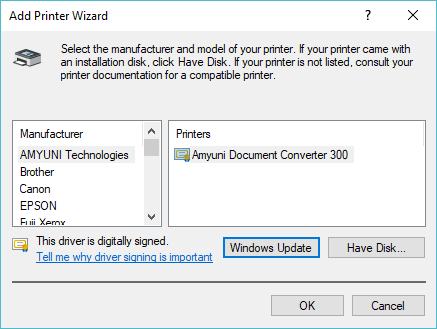
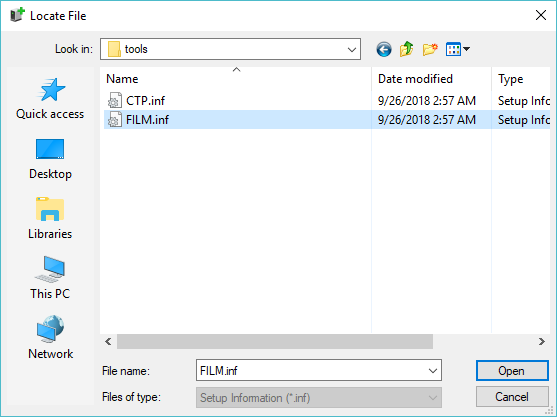
- Navigate to the files you just download and select “FILM.inf”, click “Open”:
- Select “NuStar DirectFilm v3”:
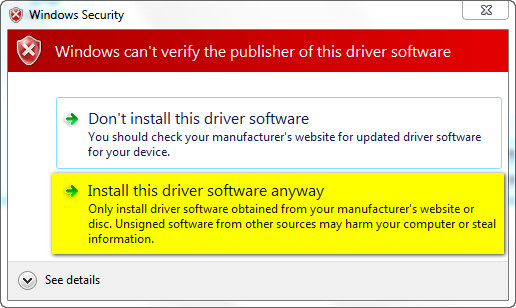
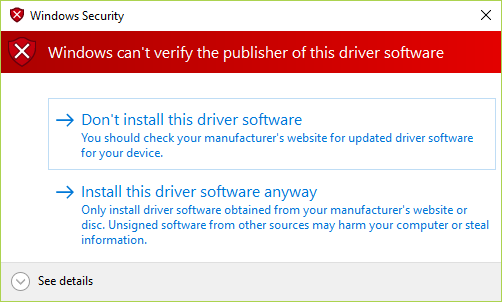
- Click “OK” and Windows alerts you with Windows Security, click “Install this driver software anyway”:
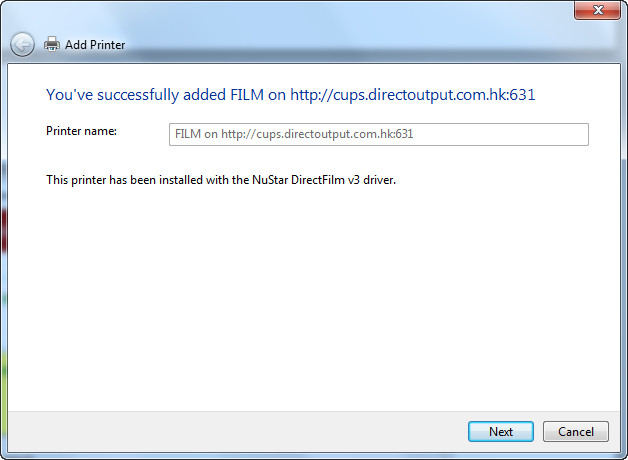
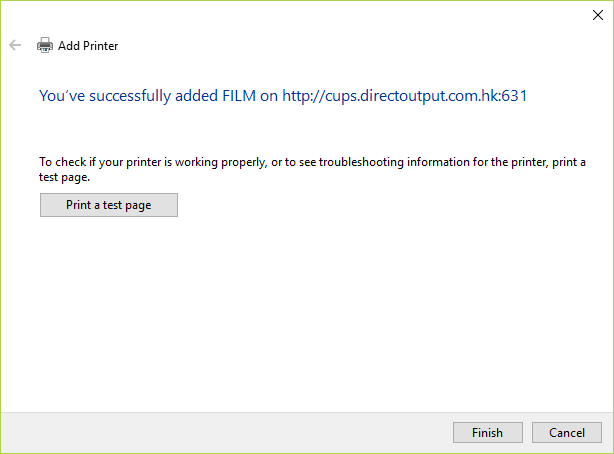
- The last step for “Add Printer” will show you the printer name, click “Next”:

- Windows reports successfully installed a printer, you don’t need to print a test page, just click “Finish:
- Setup the second Cloud Printer, Gray:

- This time we select “NuStar DirectPlate v6”:
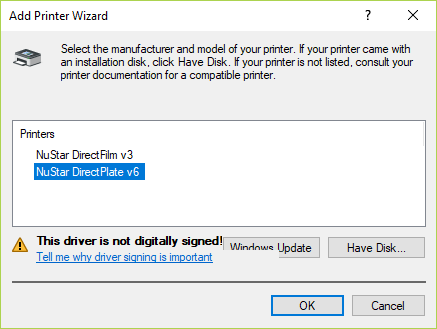
- The third printer is CTP50, keep select “NuStar DirectPlate v6”
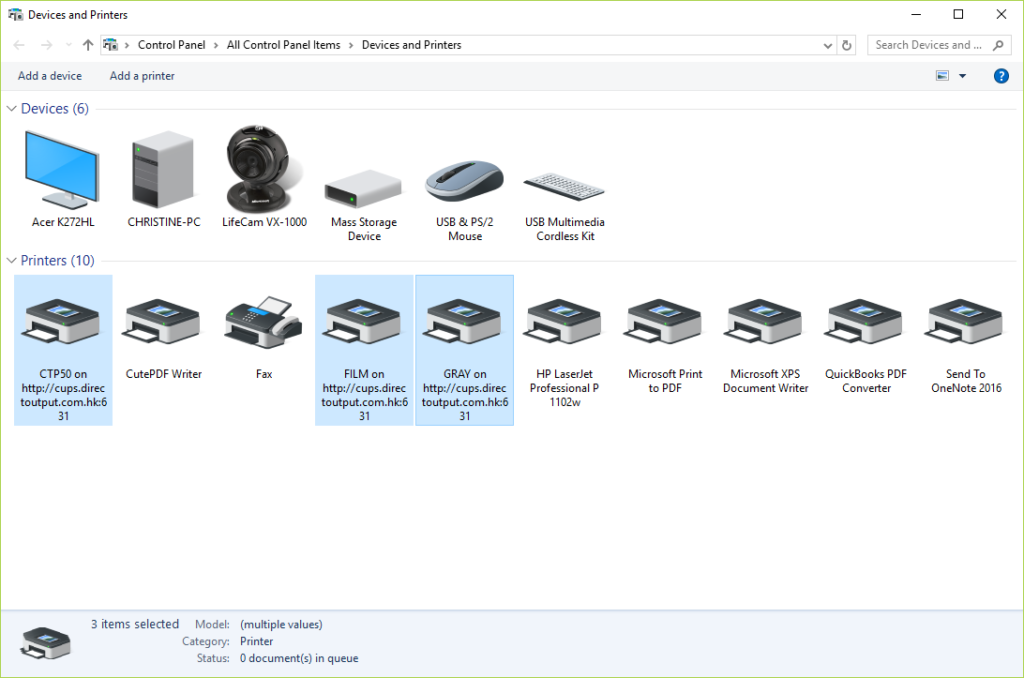
- All together we have 3 Cloud Printers:

macOS
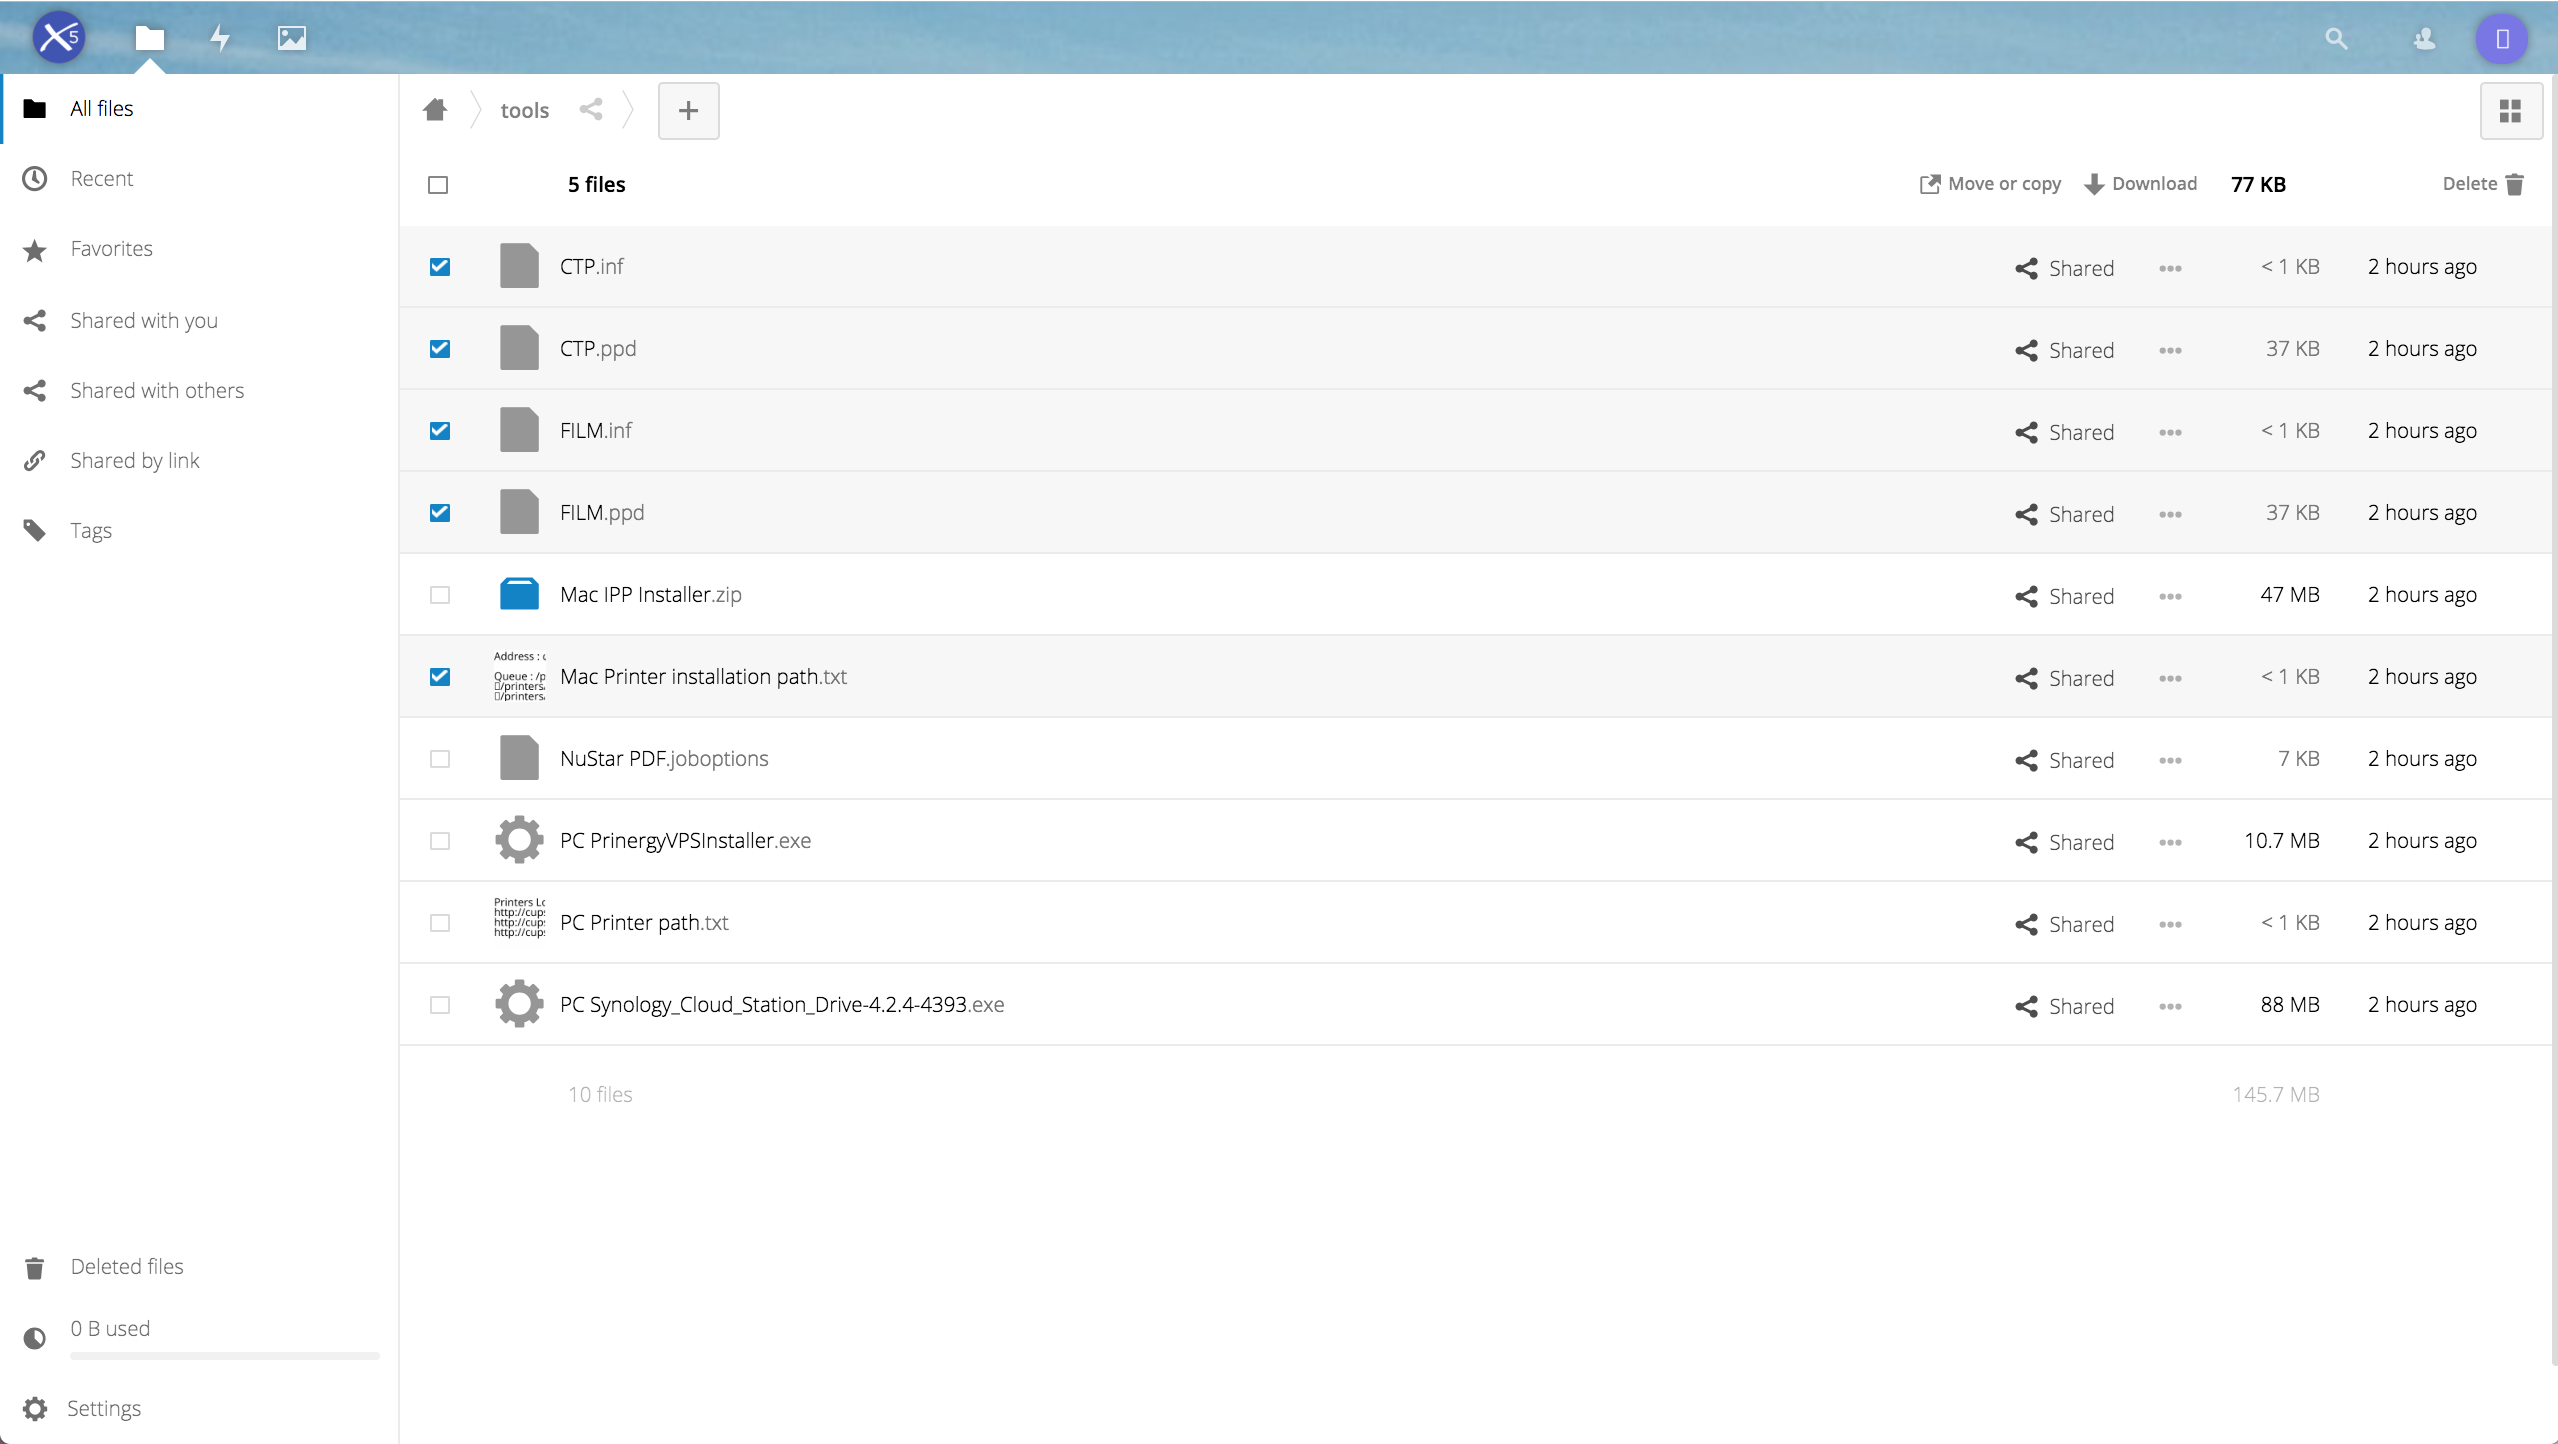
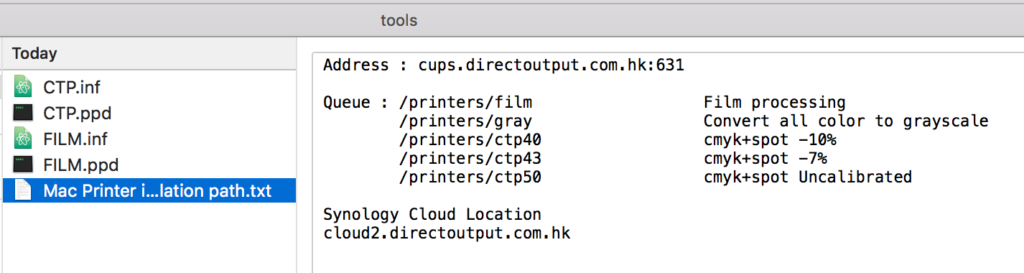
- First, download our printer drivers from your Cloud Disk, check these files under /tools and download it to your computer:

- Memorise the contents of “Mac Printer installation path.txt”, you will need them during the process:
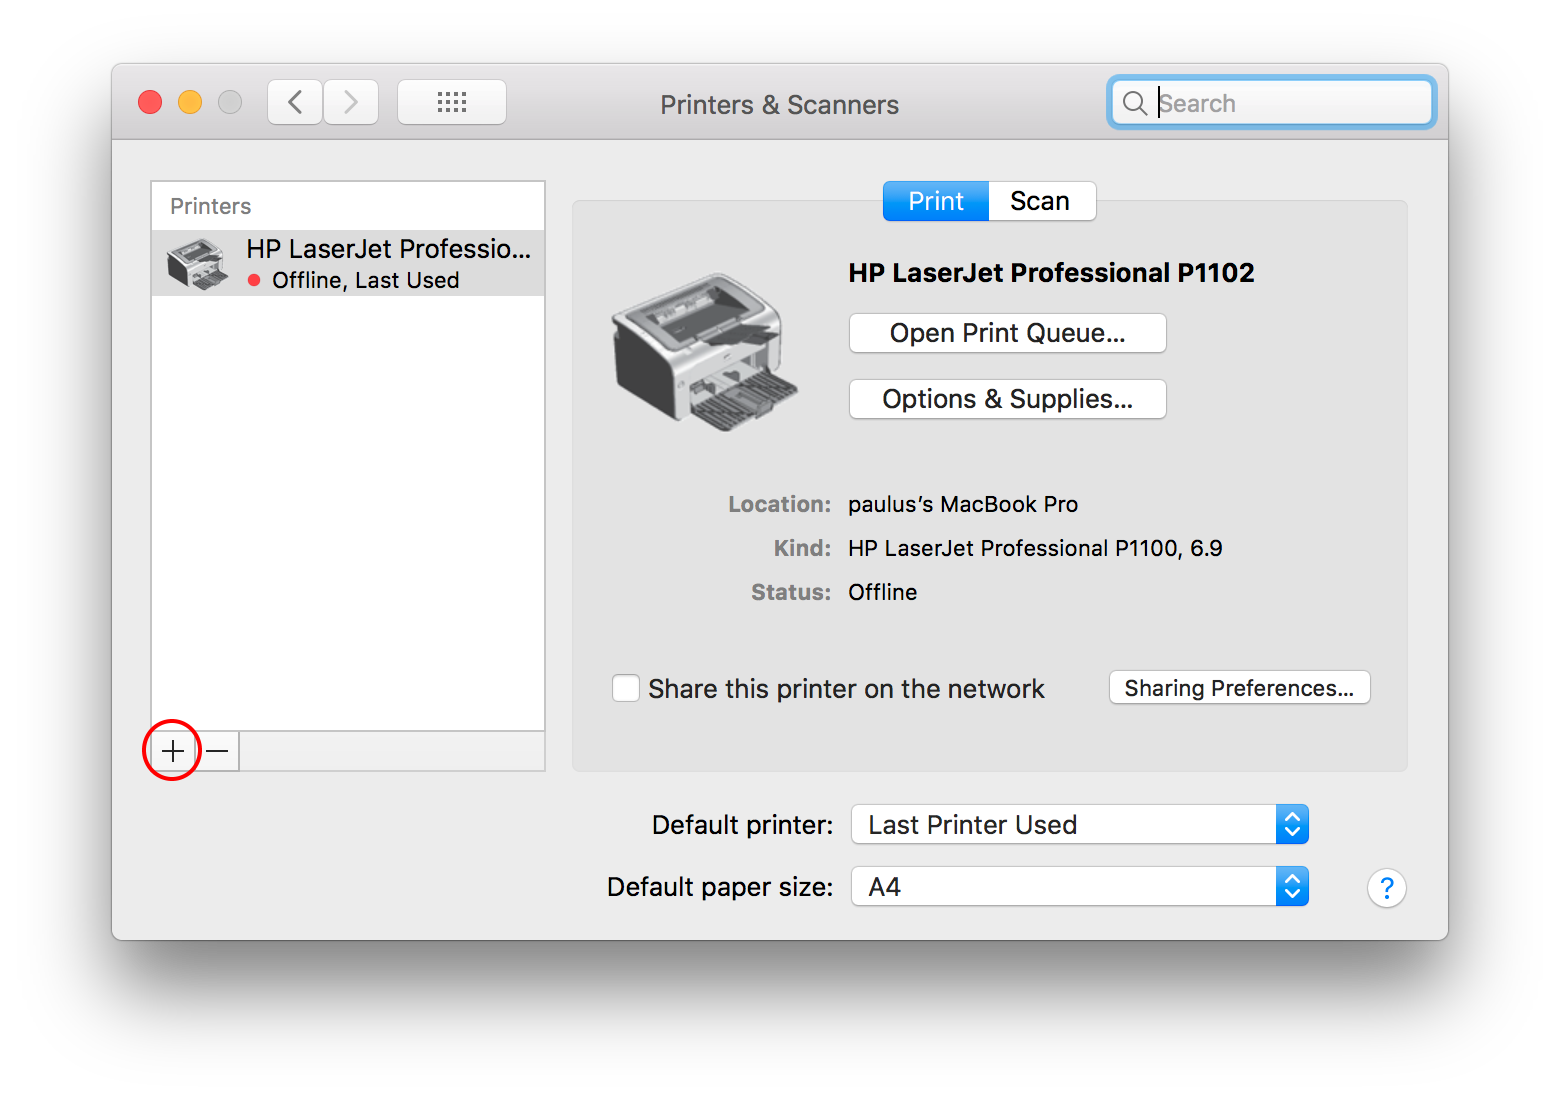
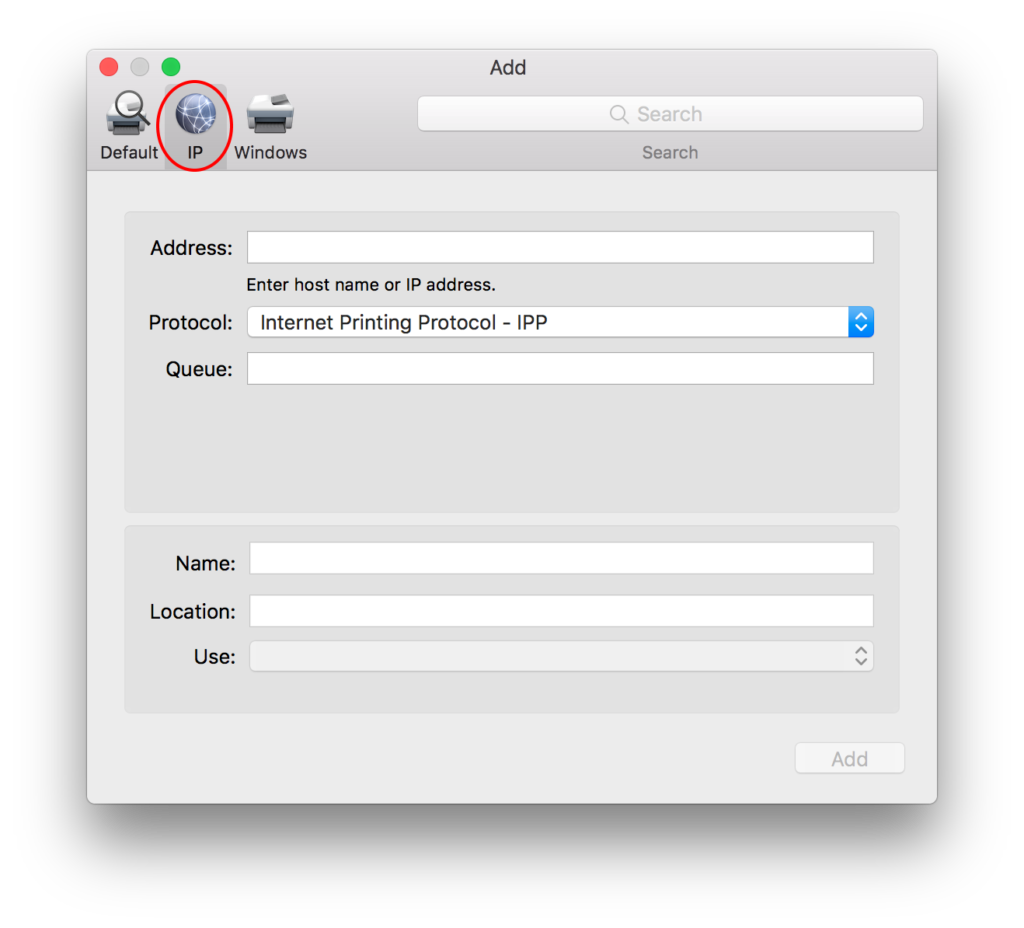
- Launch “Printers & Scanners” and click “+” (the red circle on the lower left):

- Our Cloud Printer is an IP Printer, please click “IP” (the red circle on the upper left):
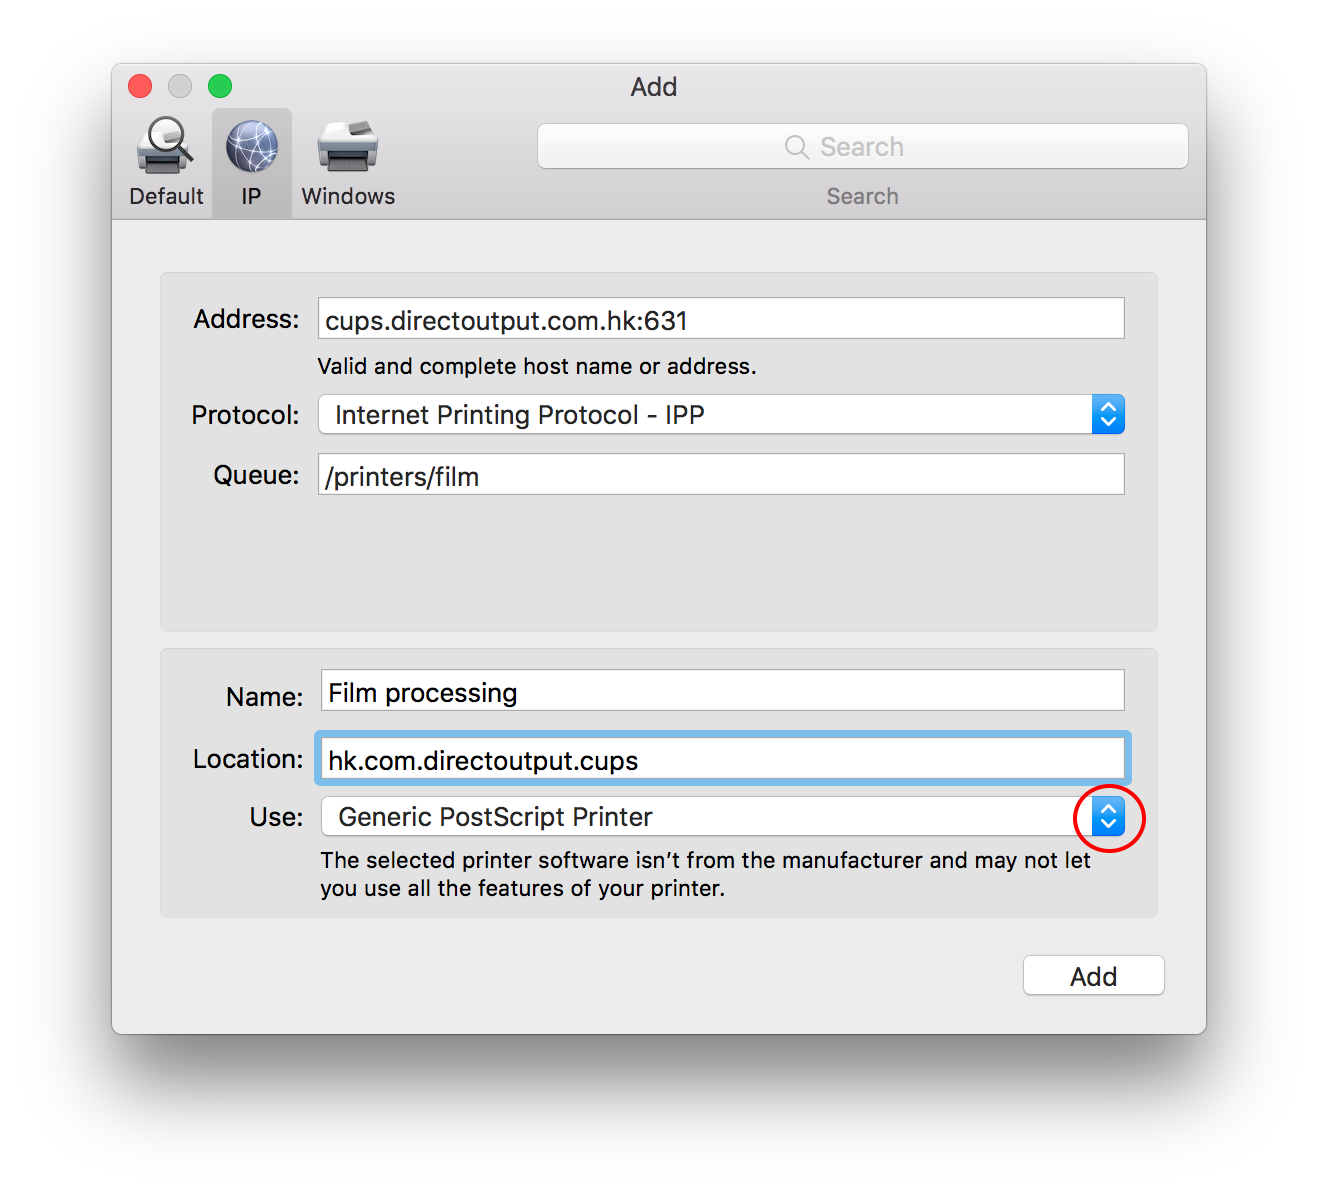
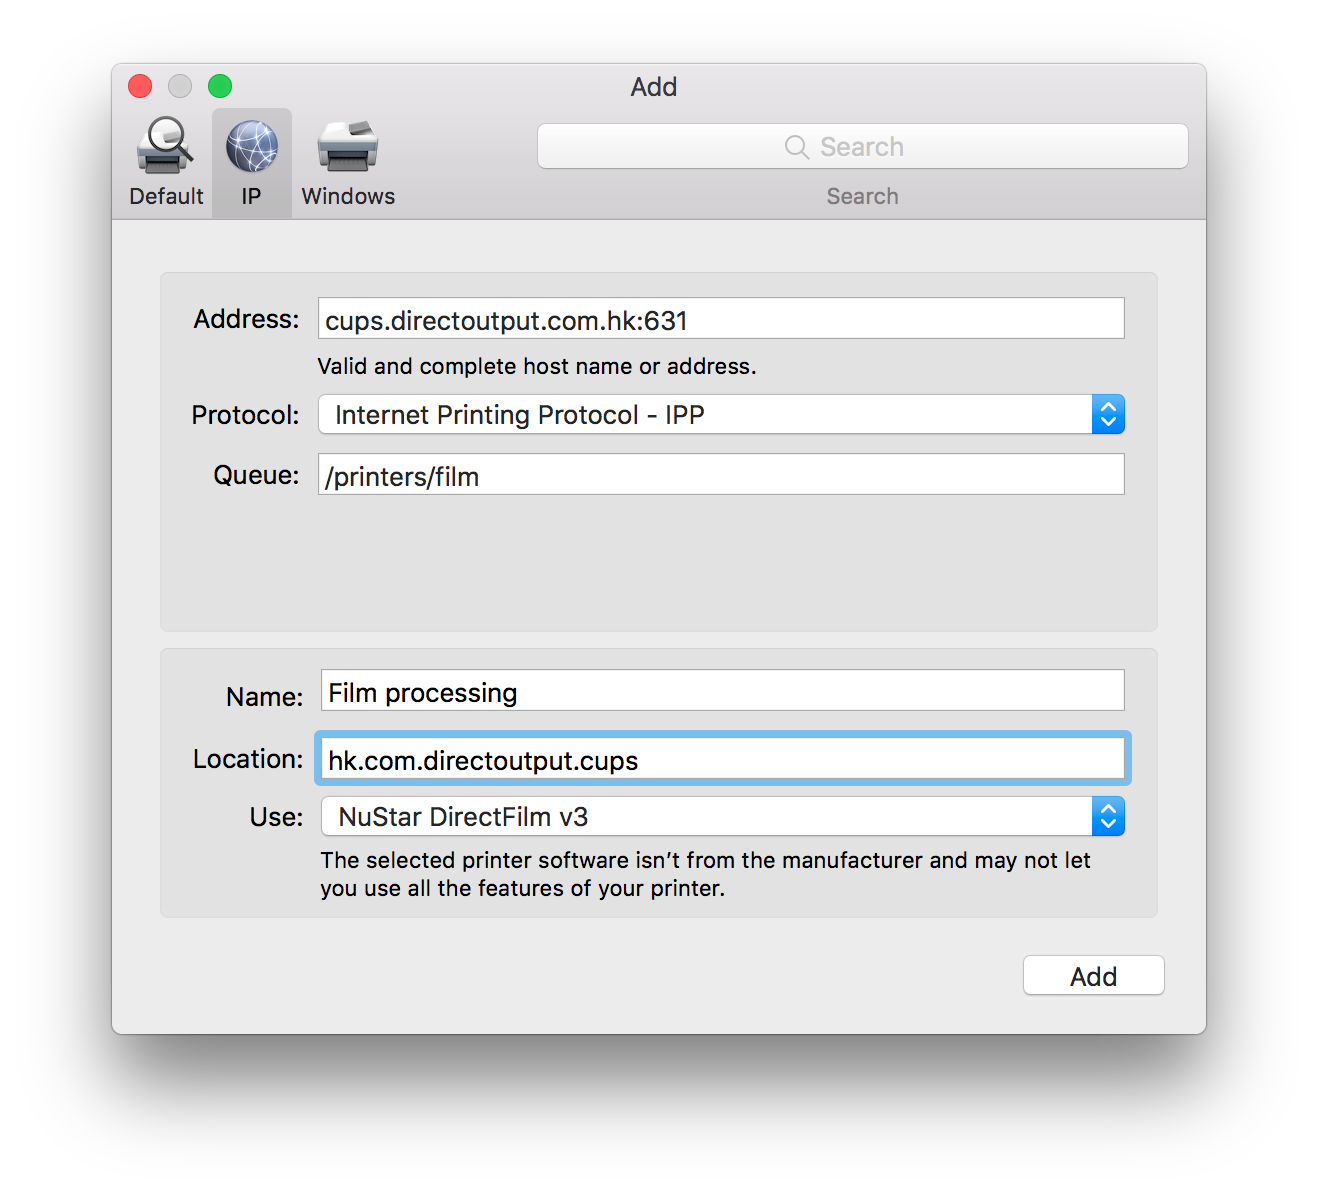
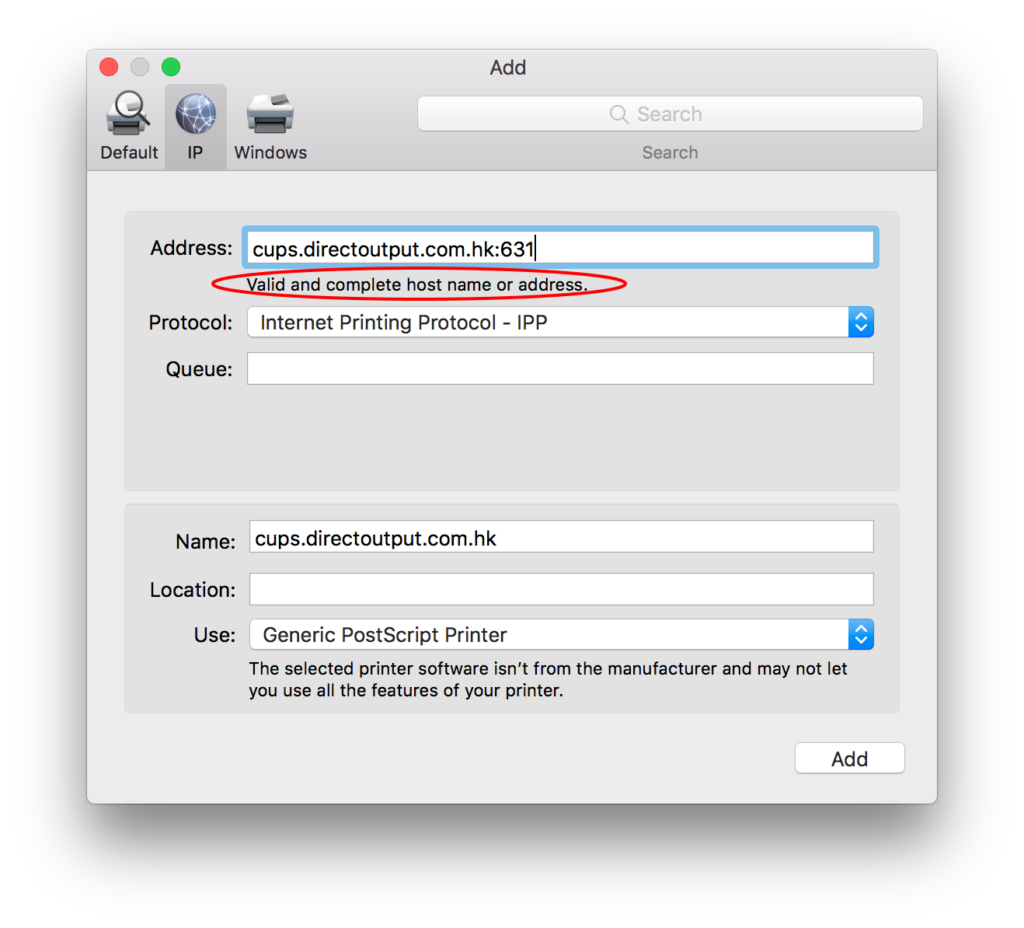
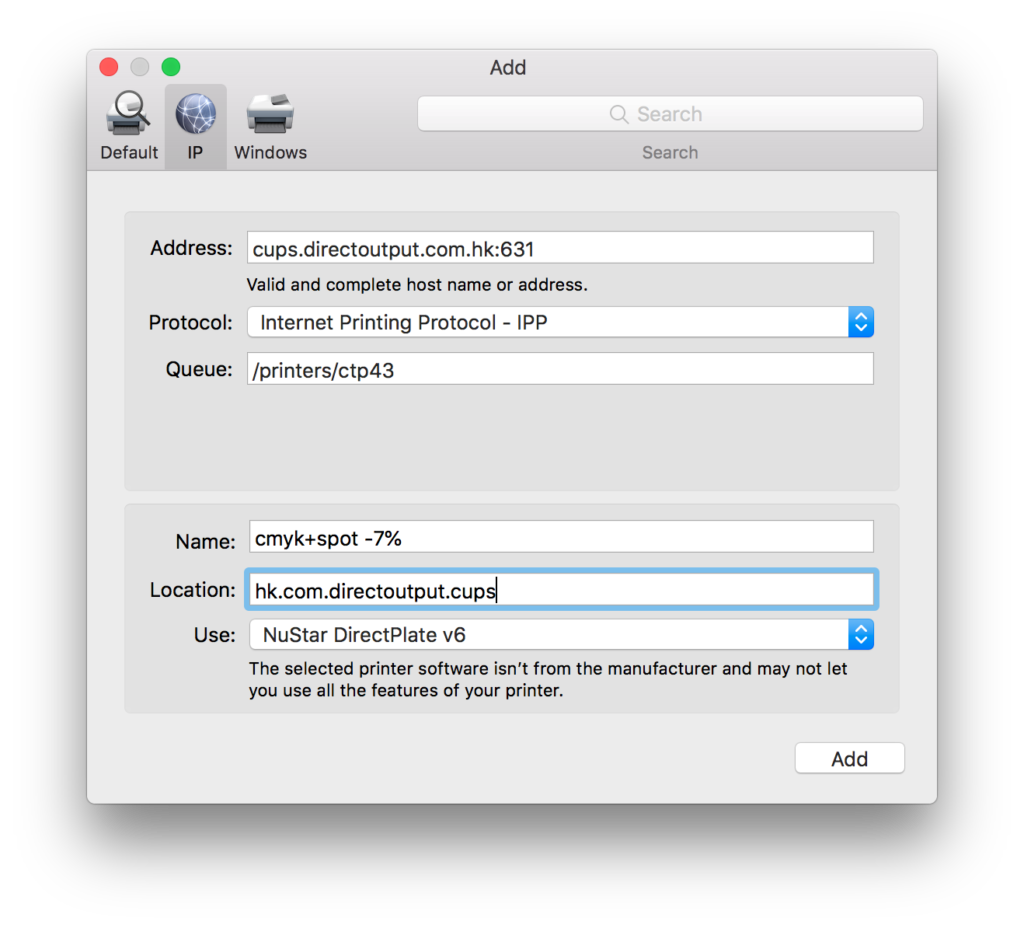
- Under Address, input our Cloud Printer path, it will be verified while you’re typing. When done, it should show “Valid and complete…” (the red circle below):
- Fill in the other information as below, Queue = /printers/film, Name & Location as shown, click the icon in the red circle:
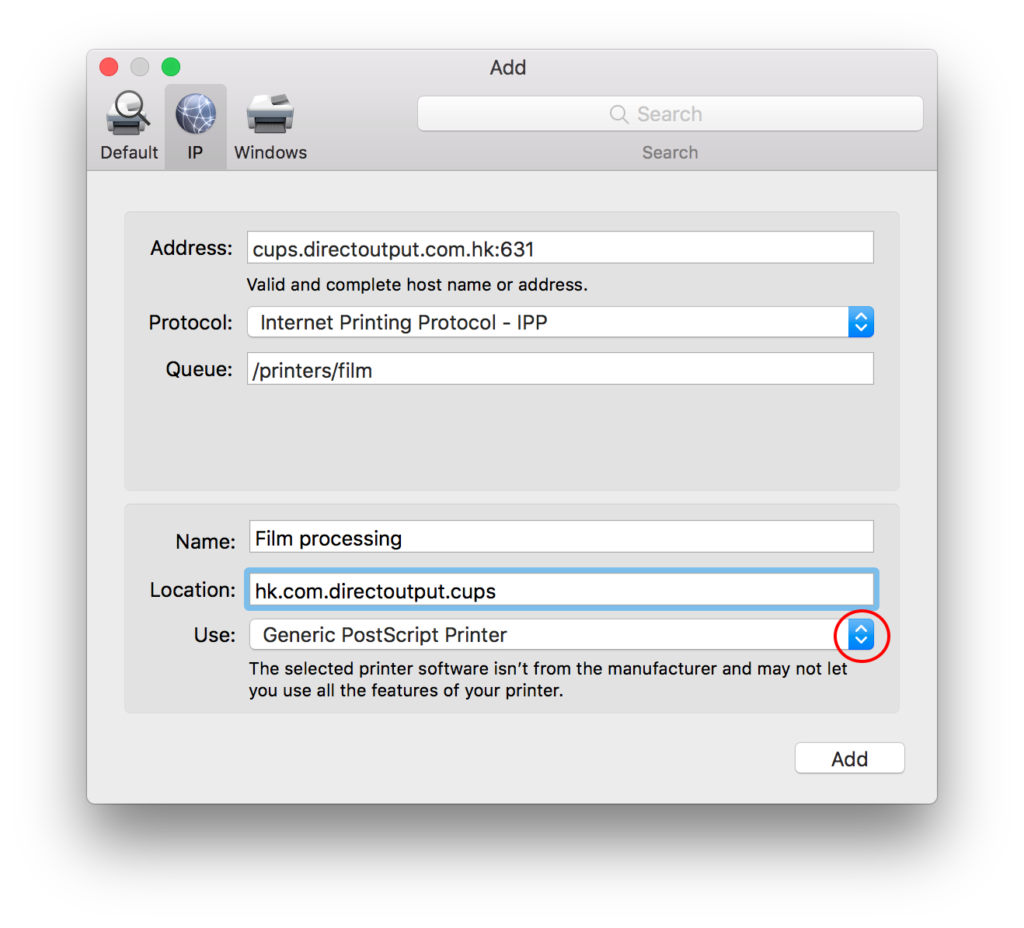
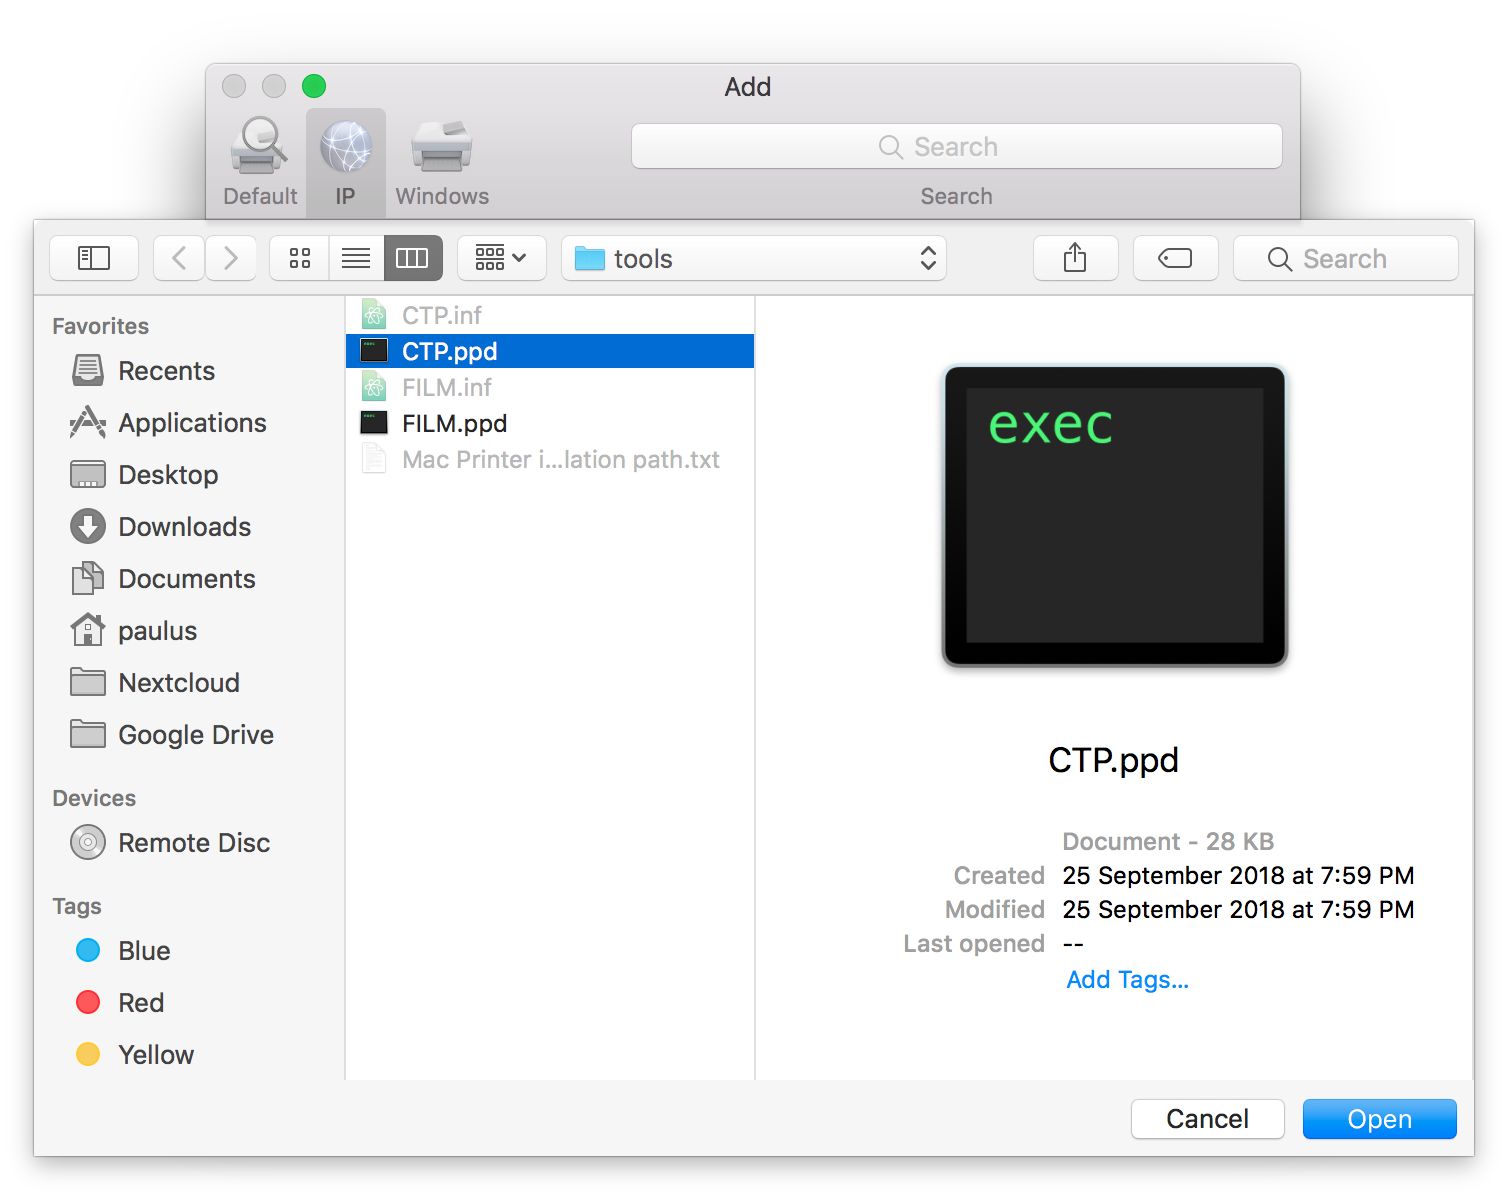
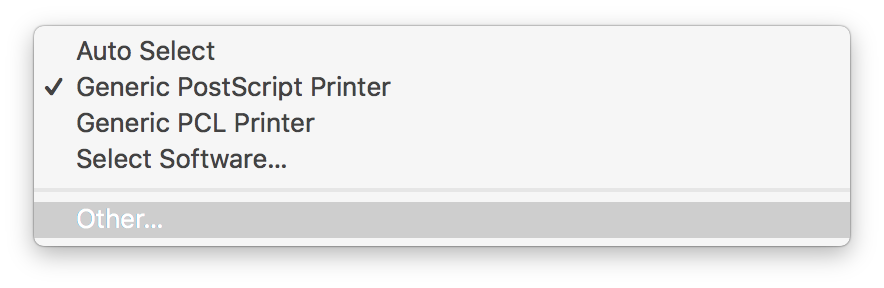
- Select “Other…”:
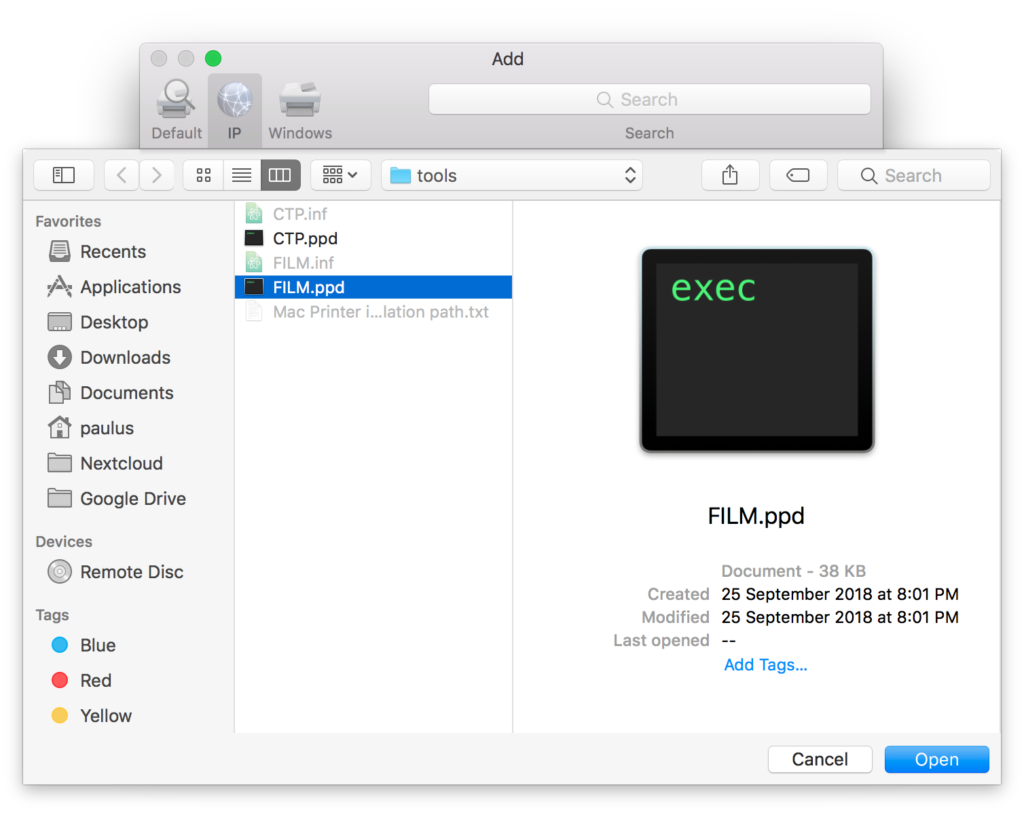
- Navigate to the files you just downloaded and select “FILM.ppd”, click “Open”:
- You should come back to the printer wizard and Use shows “NuStar DirectFilm v3”, click “Add”:

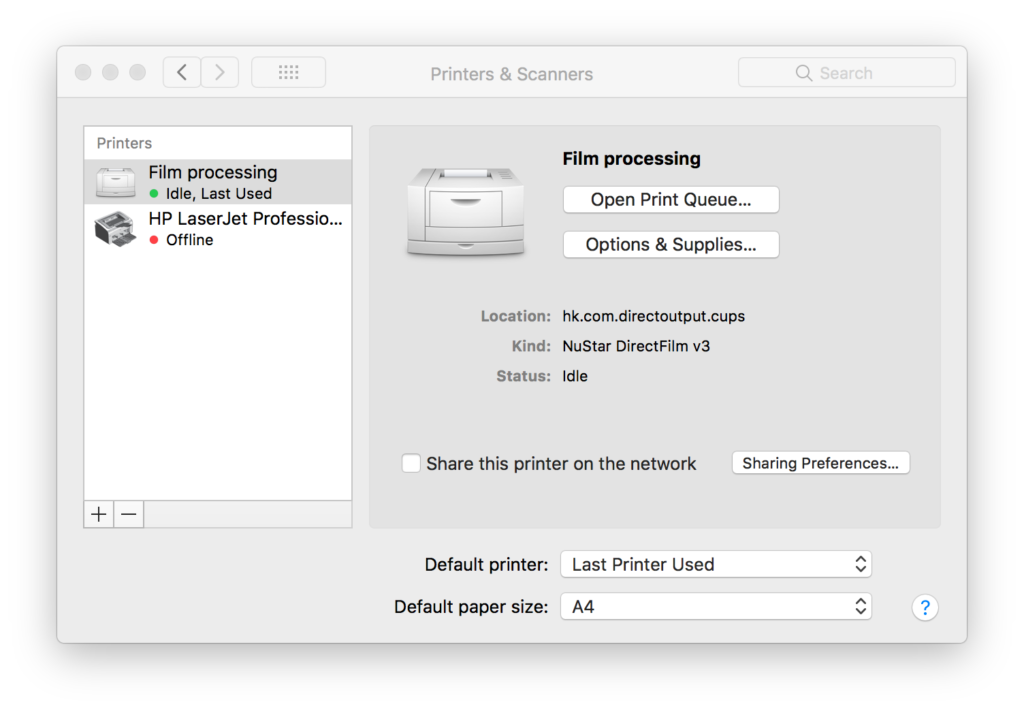
- You have added our Cloud Printer for Film output successfully:
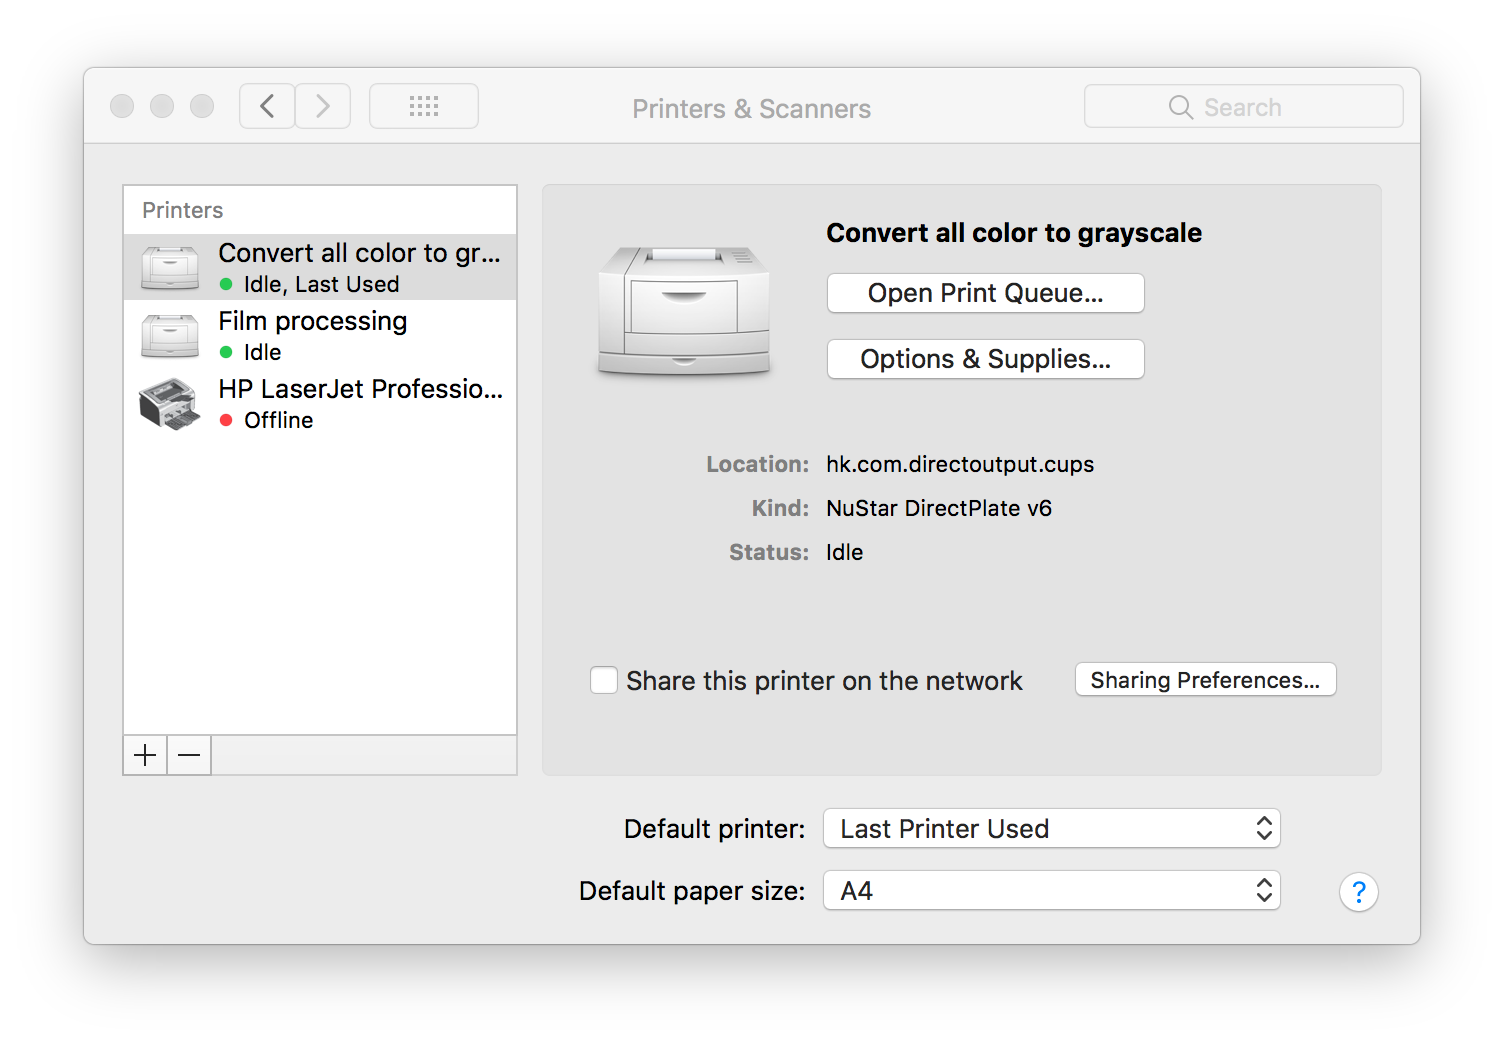
- We prepared 5 Cloud Printers for you, we setup the next one, Convert all color to grayscale:

- This time, select “CTP.ppd” for Use”:

- Use should show “NuStar DirectPlate v6”, click “Add”:

- You have another Cloud Printer:

- The third one is a “cmyk+spot -10%” which uses “CTP.pdd” too:

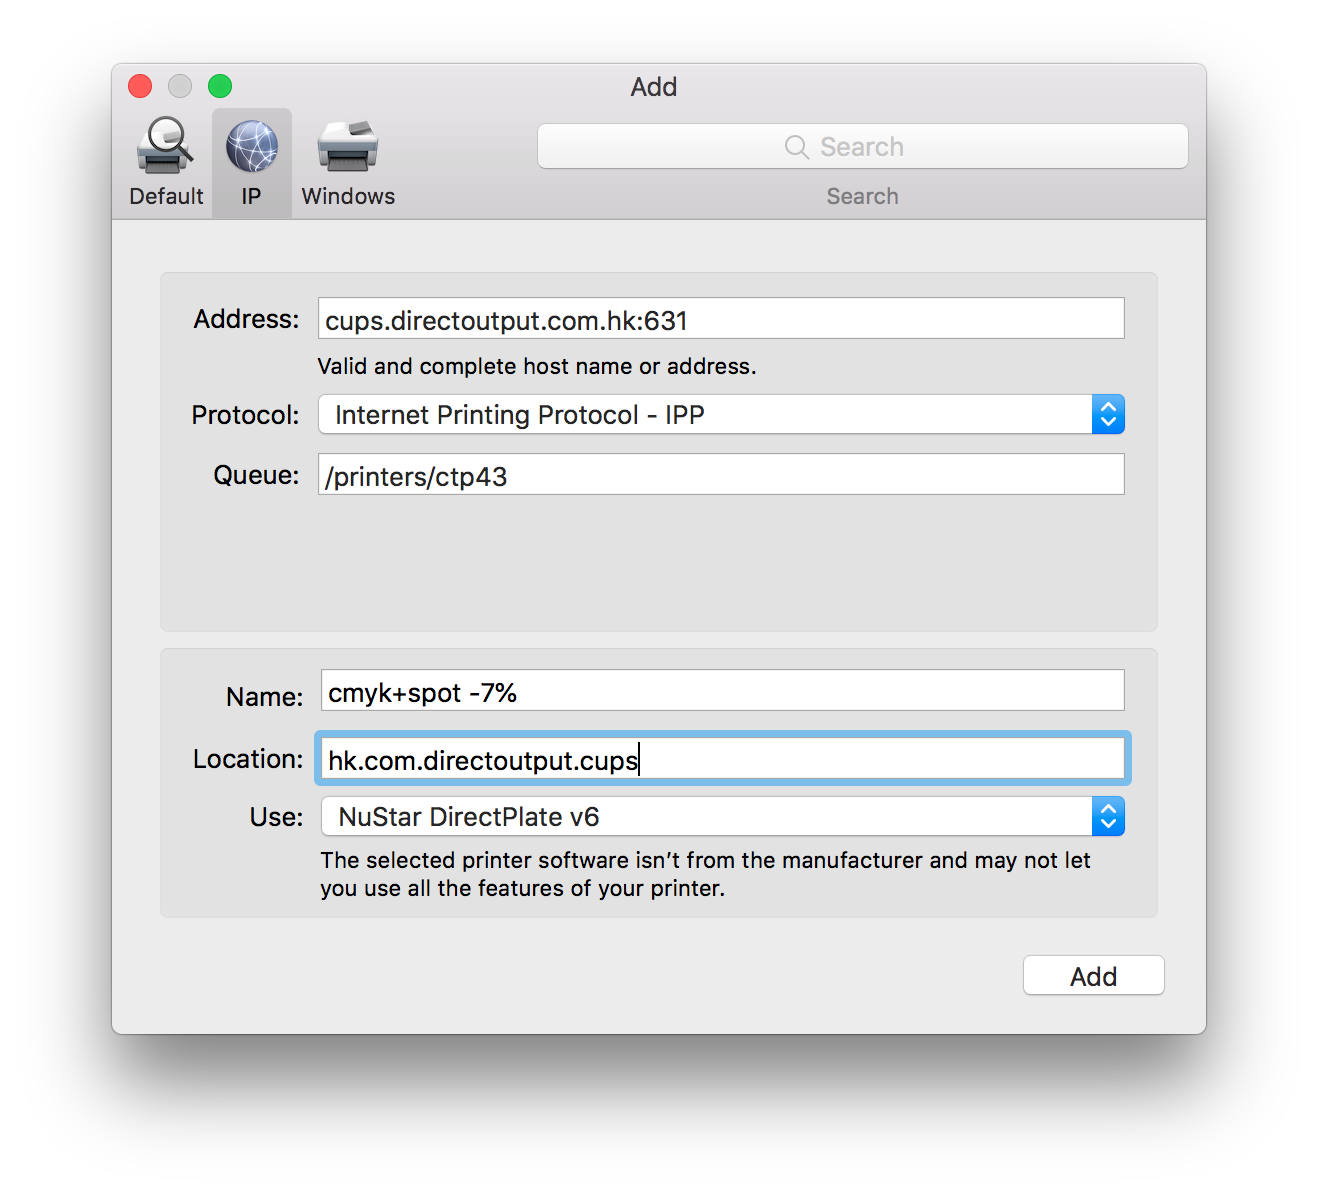
- The forth is “cmyk+spot -7%” which also uses “CTP.ppd”:
- The last one is “cmyk+spot Uncalibrated” and it uses “CTP.ppd” too:

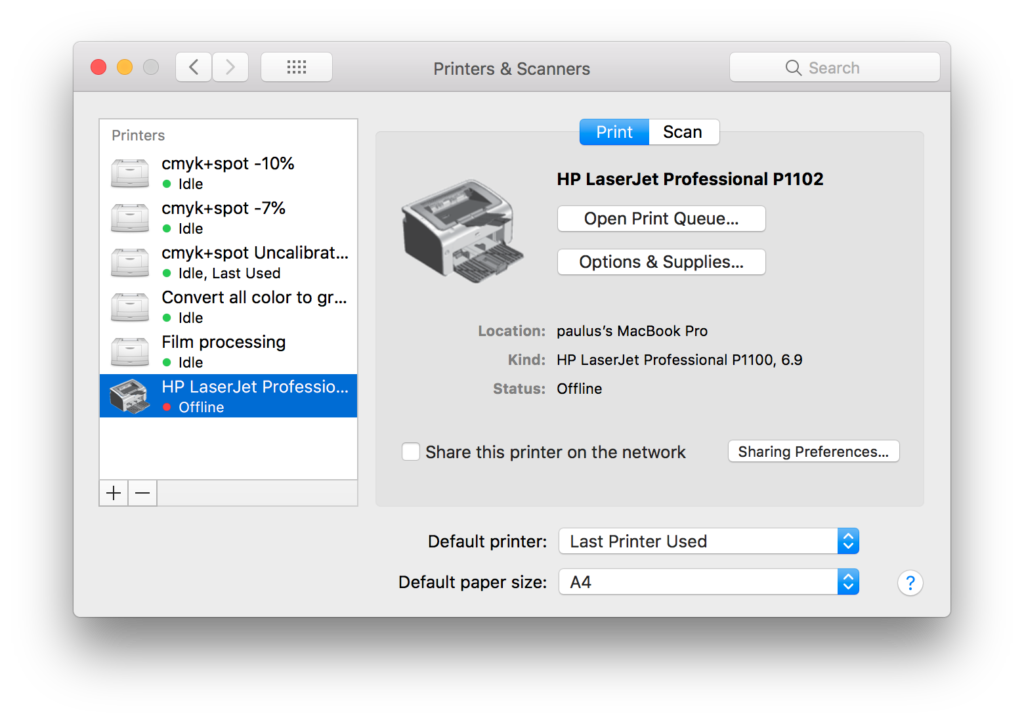
- All done, you have 5 Cloud Printers: